


Manage Products
Products
Creating products as a Vendor on YuHu Creates is super easy. After you registered as vendor and completed the setup wizard, you can easily create products and customise them from an intuitive dashboard.
So check out the documentation to know the process of creating products:-
Create a product from the Vendor dashboard
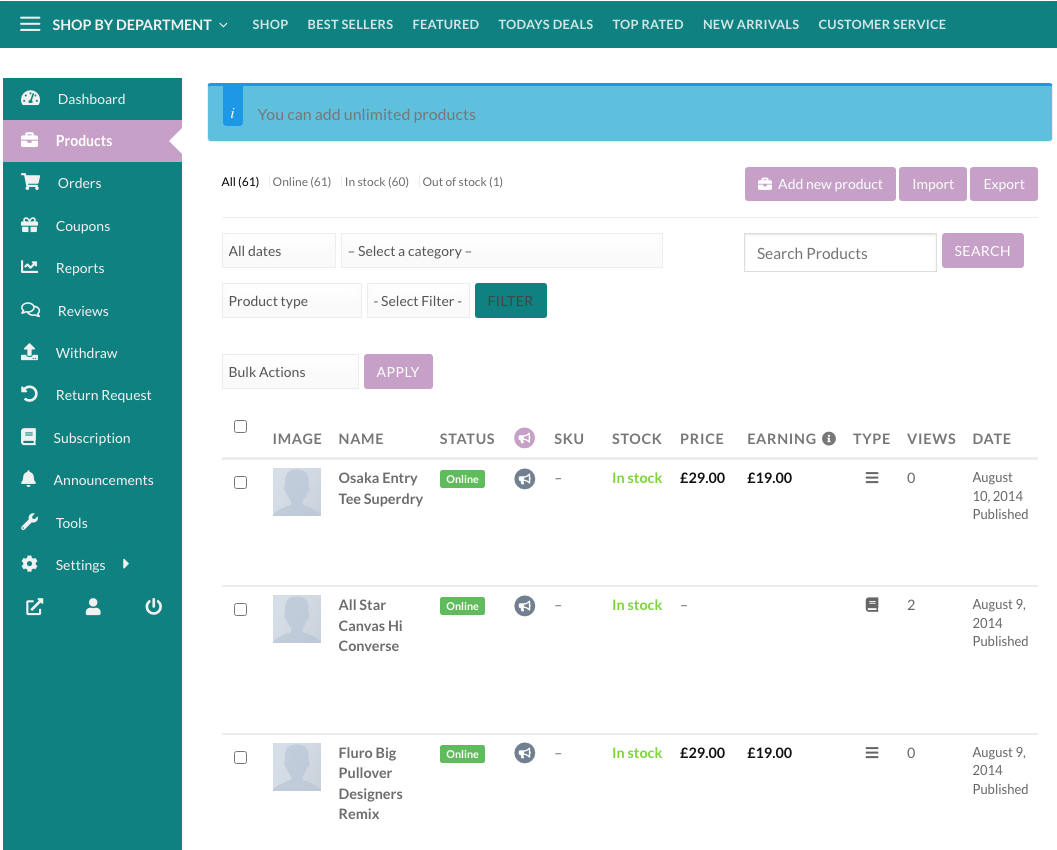
To create a product, navigate to the vendor dashboard. And then click on Products from the left menu. After that click on the Add New Products button from the top right corner.
You’ll get a new window where you will be able to create a new product giving all the details only.
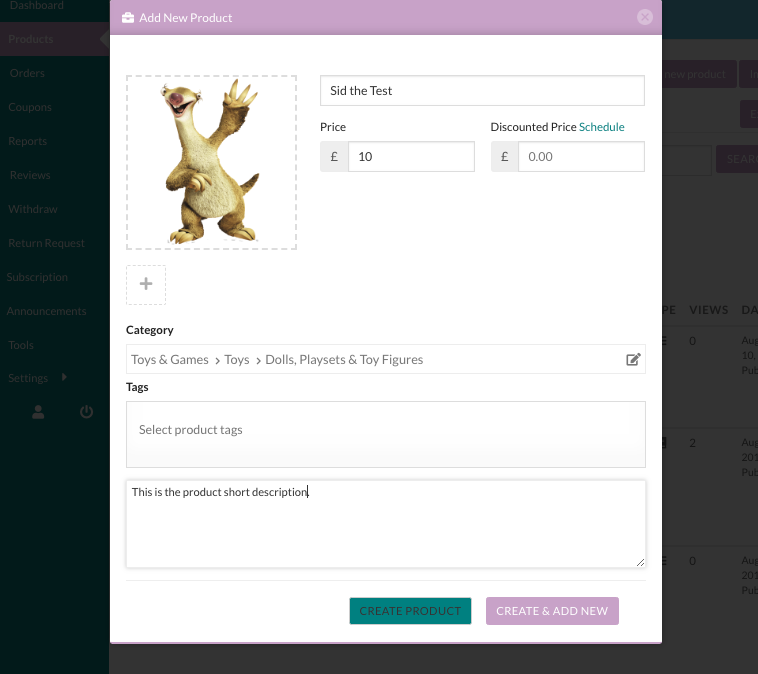
Basic Details
The common information about a product are the title, price, description. Discount price is optional. You can even schedule discounts for a certain amount of time. You can enter a starting date and end date to apply automatic discounts to your product.
Categories have to be created by the admin. For this reason, if you would like us to add a category that you would like to sell in. Please feel free to contact us at vendorsupport@yuhucreates.co.uk The Vendor can only select them from the frontend dashboard. Because allowing the vendors to create categories and tags might result into duplicates.
Select Category
By default, category selection is singular. That is why there is a drop-down field to select a category. This is a standard-setting. Because according to Google Webmaster Guidelines and other SEO and UX best practices, it is recommended to have only one category assigned to a product. If you need to show your products based on multiple factors or for searching or sorting feature, you can use tags.
You can select the category from the drop-down table.
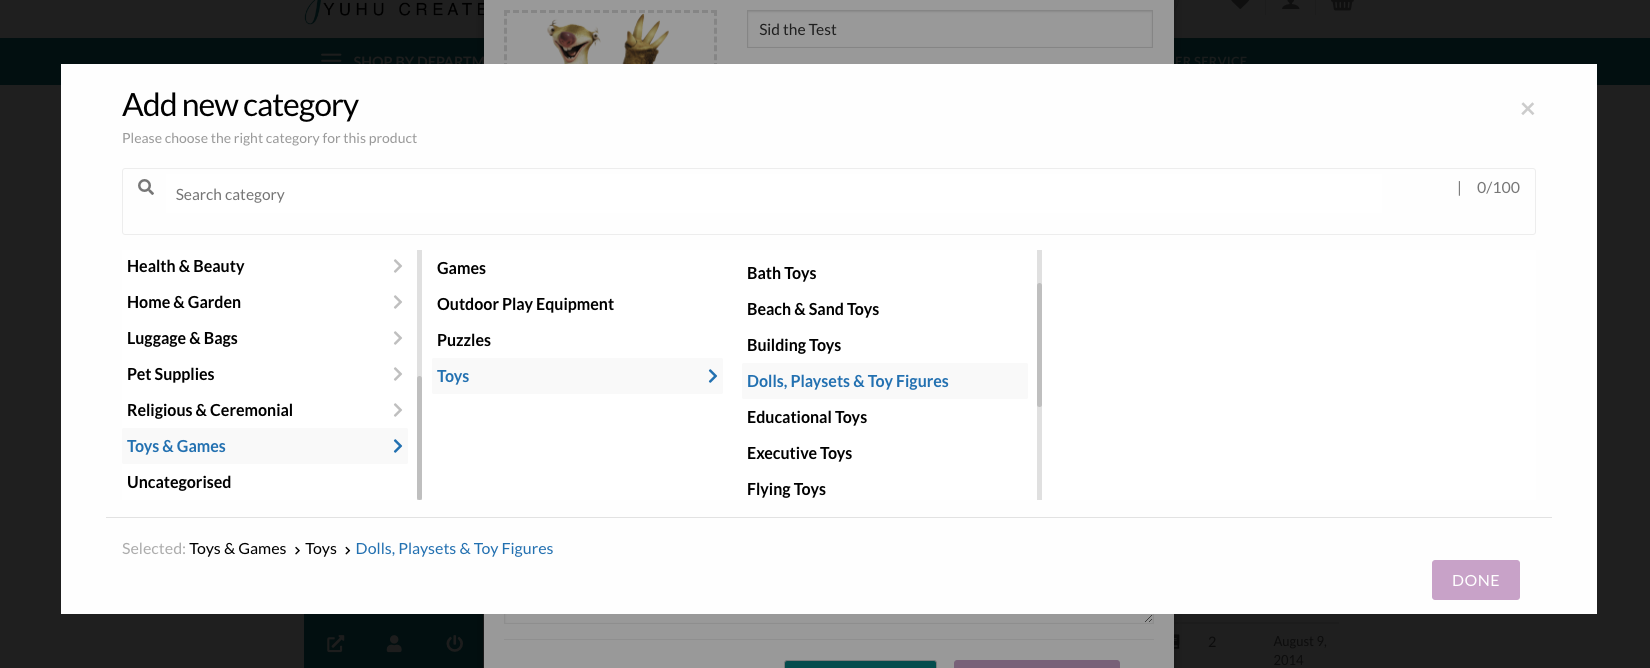
You will see a pop-up where you need to select the correct category,
In Addition, you can also search for categories as well. Just type the category name in the search box, you will see the matching categories,
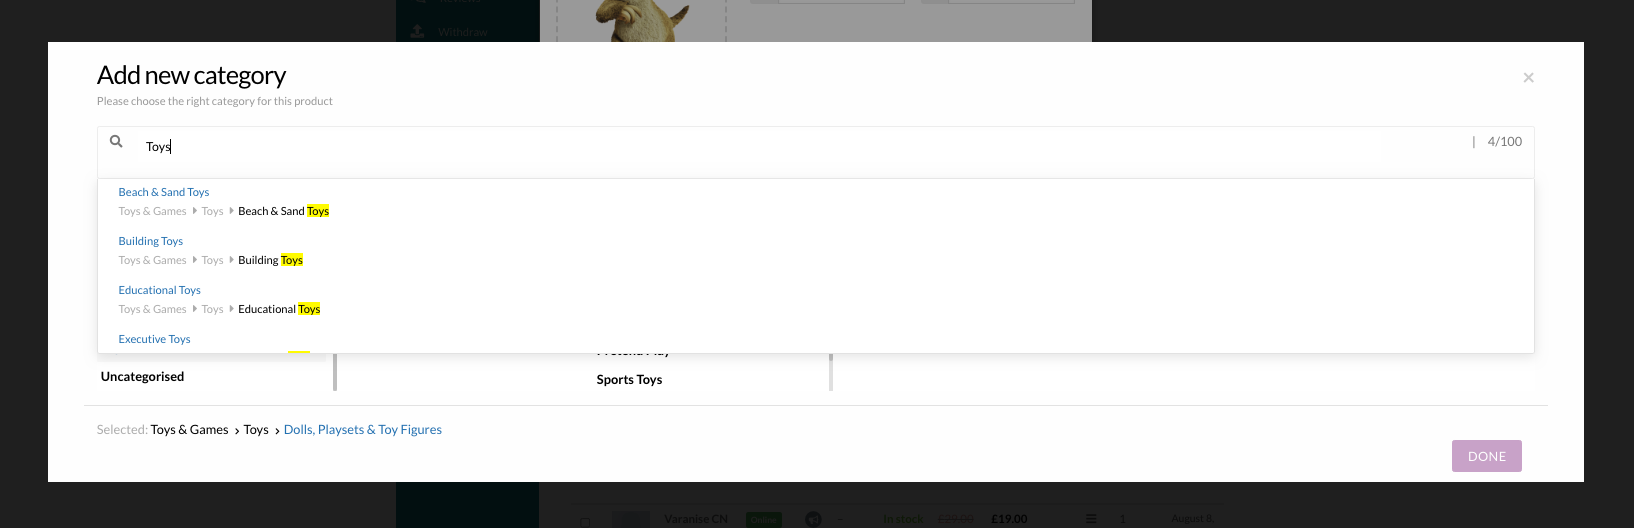
Click on the Done button to finish adding it to the correct category.
Create Tags
You are able to create new product tags from the Vendor Dashboard.
Click on Vendor Dashboard>Product>Add New Product. Under the Select Product Tags field, add a tag and Press Enter. The word or phrase will be added as a separate tag.
Note: you can only add up to 3 Product Tags
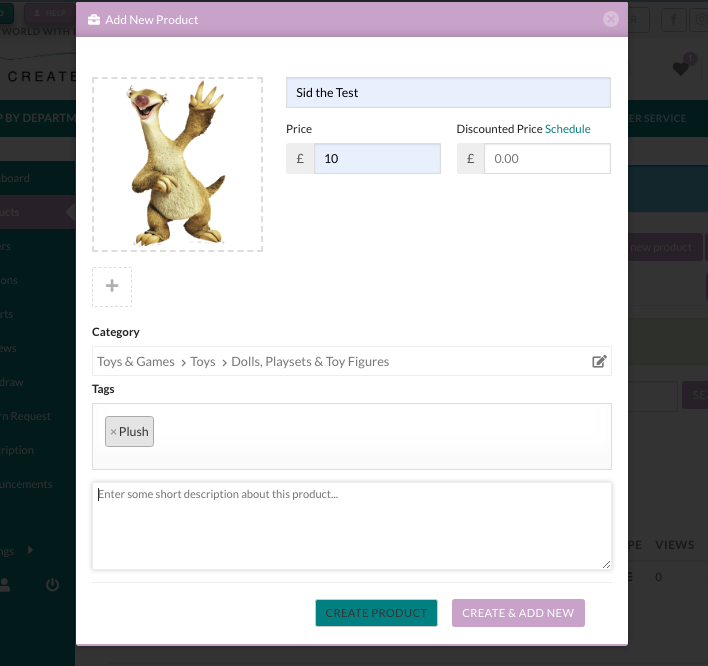
After you have provided all the required information, Click on the Create product button. It will create the product and redirect you to the product edit page, where you will be able to add more information about your product. If you want to create the product and add another one immediately, click on the Create & add new button.
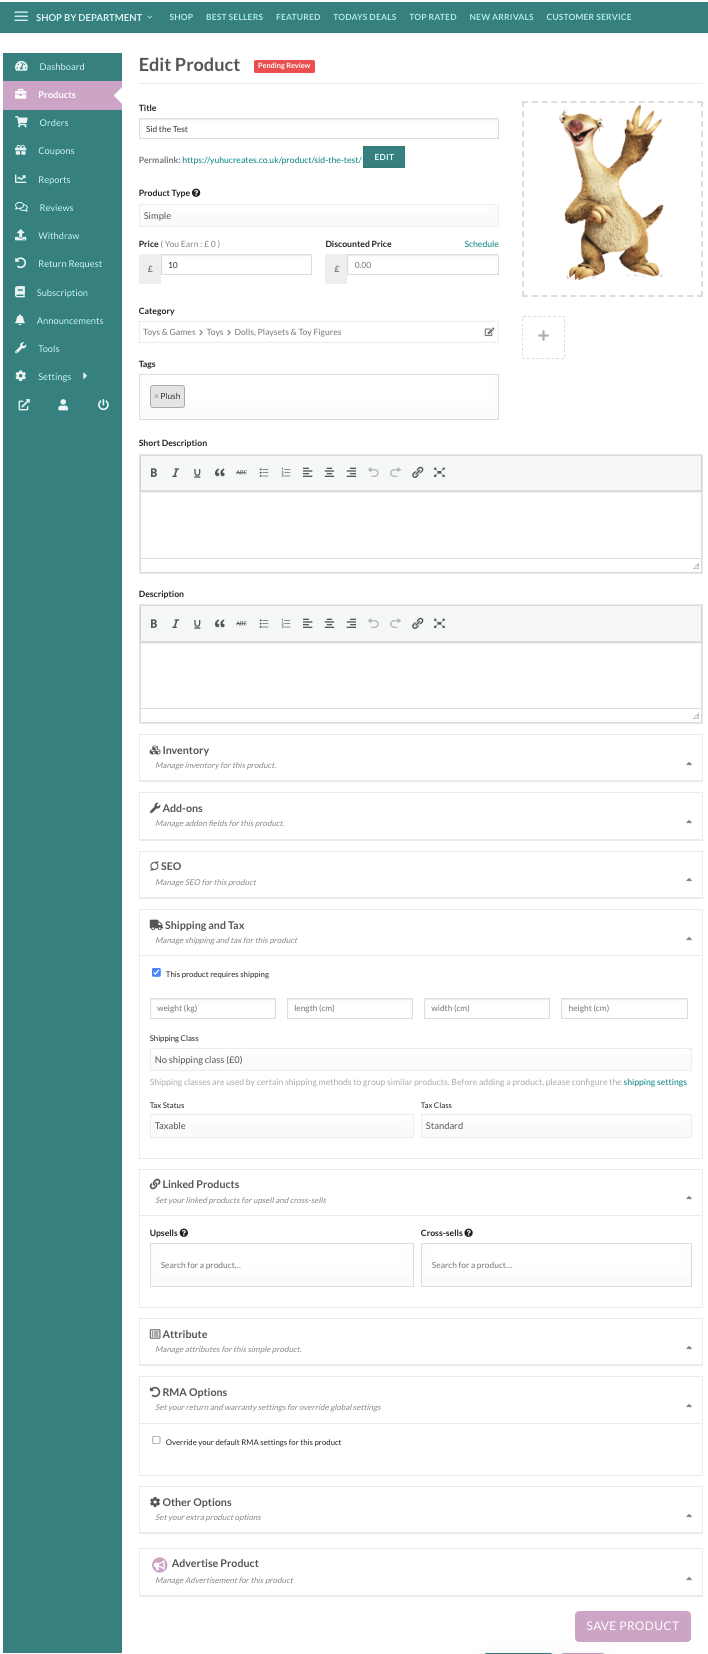
After you have been redirected to the product edit page, there is an option to select a product type. You can select either a Simple or Variable product.
Selecting Product Type – Simple Product
These types of products are simple and have no variants. They are single and standalone products, which do not require any other information to define different variants.
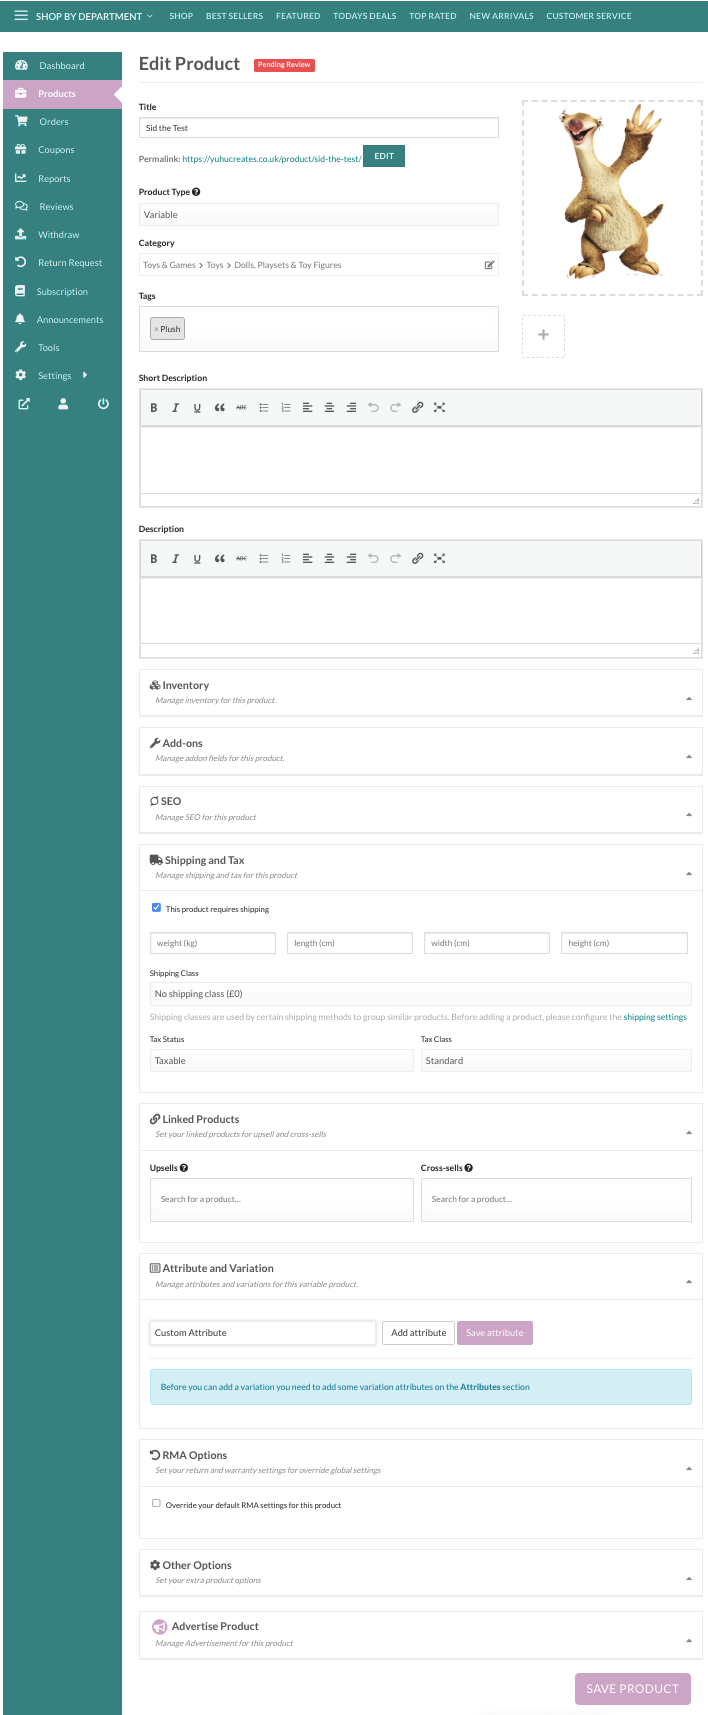
Selecting Product Type – Variable Product
A variable product is a product that has different types of variants. For example, you might want to sell a dress which is available in 3 different colours and sizes. So this option will enable you to add those colours and sizes you need. You can add variations based on anything you like, perhaps material used or the stitching style.
We have streamlined the variation adding and creation process in our interface to improve the user experience.
To create a variation, the you have to select Variable Product. Then some new fields will appear under the Attributes tab to input the variations. We may have already created the attribute, then you can select them from the dropdown on the top right and click Add Option. If you do not need all the attributes in your product, then you can remove or add more if you want.
Now if you need custom variations and attributes of your own, then you have to select Custom Attributes and then click Add Option. Then two blank fields will appear to input the variation name and attributes.
You can add as many variations and attributes as you want. When you are done, check the box Create variation using those attributes. The system will make all the combinations and will prompt you to add prices for those variations.
If you want to disable any variation, then you can uncheck the box on the left.
Quantity and variation picture adding function will not be available right away. You have to save the product once to get those options. Right after saving the product, the fields above will have a pencil icon on the right. Click on that to add more details to the variations.
Inventory
This is where you can ad the product SKU. None of these fields are mandatory. If you do not need to add stock quantity and your listing is just a simple product, then you can totally skip this section.
But if you are creating a listing for a product like a dress or t-shirt, which has multiple sizes, then you should read this section carefully.
What is an SKU?
SKU stands for Stock Keeping Unit. It should be a unique set of characters which will not match to any other product.
Enable Product Stock Management
Let’s say you have 10 pieces of the product and you don’t want to receive additional orders after they are placed for 10 units. If you enable stock management and enter 10 in the quantity field, then after 10 units are ordered, this product will show a message that all the quantities are sold and there is no stock.
Addons
These are additional product setting that allow you to add extra items to your product. For example if you wanted a customer to add a name or tick box. Add-ons can be set globally for all your products here or individually while you edit a product.
Product SEO
Your product SEO can help you to increase your store traffic to your products. You can set your SEO title, meta description, meta keywords, Facebook title, description, image, Twitter title, description and image.
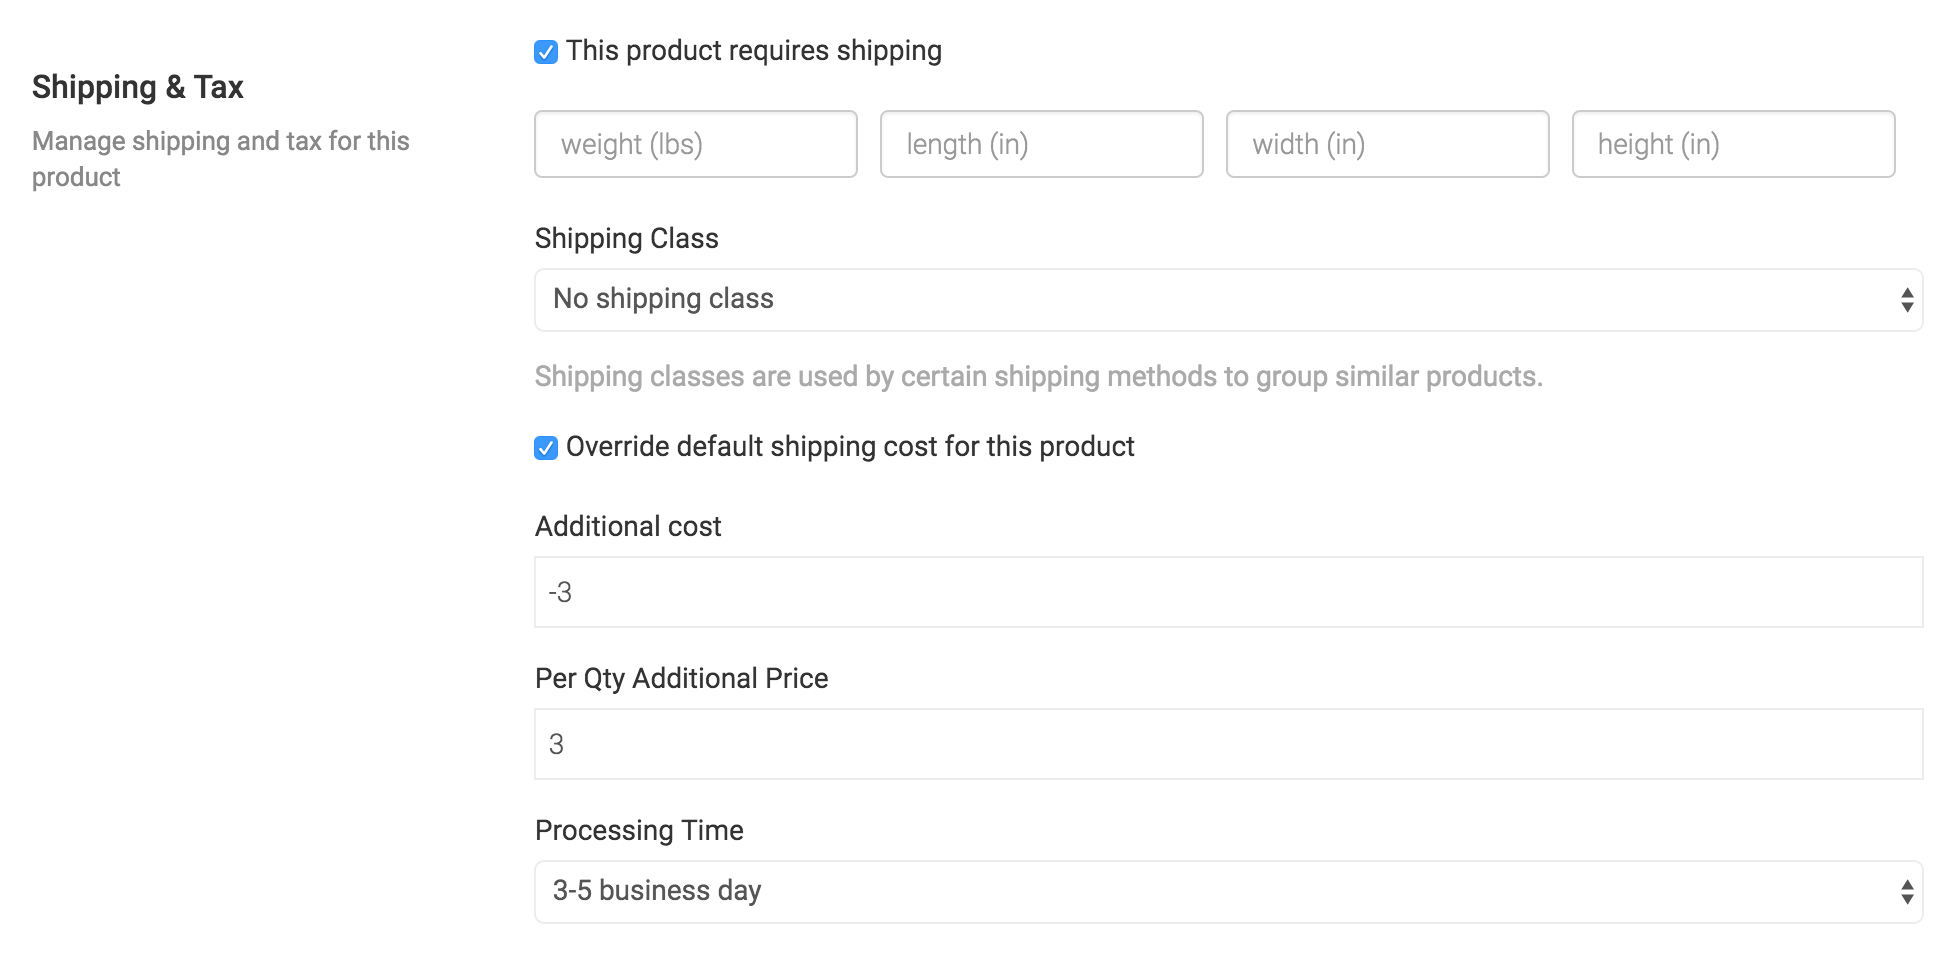
Shipping and Tax
Here you can add the weight and dimensions of the product which can be used on you shipping labels.
You can also define you Tax the is charged per product. Keep in mind all prices are added including Tax on YuHu Creates.
Attributes
This is were you can add your product attribute. We use them in the filters for the consumer to find specific items.
We strongly recommend you add the following as standard as they are required by most third parties like Merchant Centre:
- Age Group
- Gender
- Colour
- Material
- Brand
Additional Standard Attributes which customers can navigate with:
- Occasions
- Item type
- Ready to dispatch
If an attribute you require is not available you can also add custom attributes and we will review them and if they are valid we will add them to the standard attributes.
Discount Options
To encourage sales you can enable bulk discounts.
RMA Options
Here you can overide your global Warranty and Returns policy and adjust it at a product level.
Other Options
Visibility: The visibility option defines the privacy of the product. By default “Catalog and Search” is selected. But if you want the product to only appear on category listing page, search results or want to list as a hidden product, then you can select the option respectively.
If you select any other option than Catalog and Search then the product will not appear on the site other than the store page.
Purchase Note: If you want the customer to receive a custom message right after purchasing the product, you can paste that in the box.
Reviews: If the vendor does not want to receive reviews for the product from the customers, he can turn it on or off.
Was this helpful?
Yep Nope